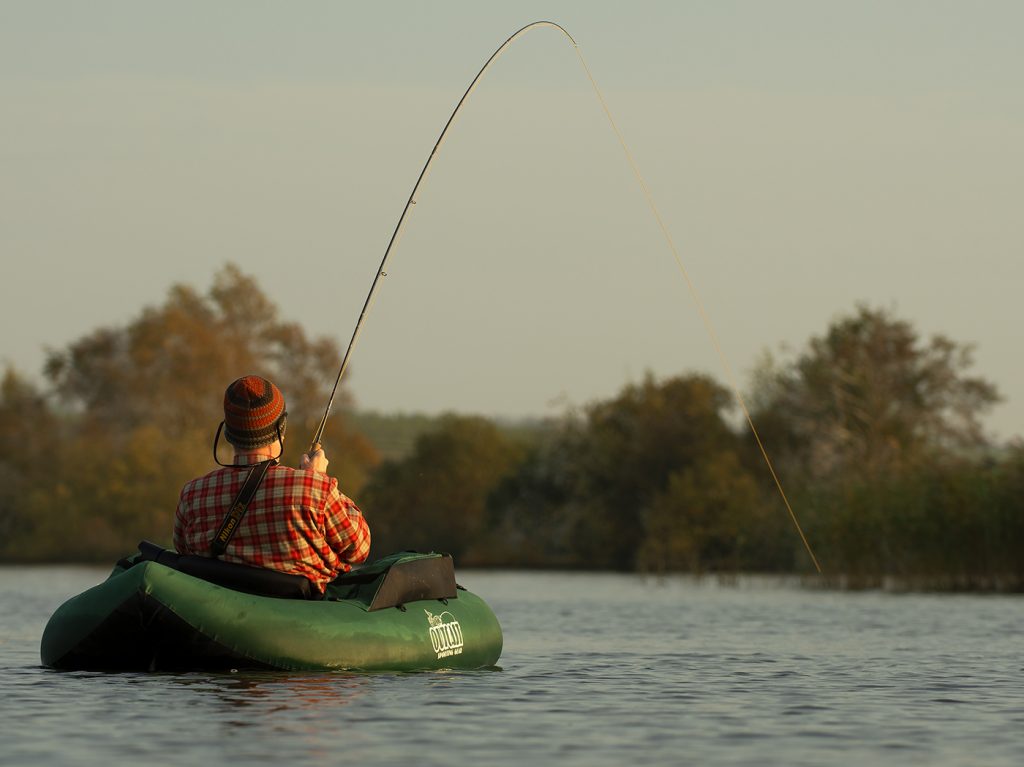
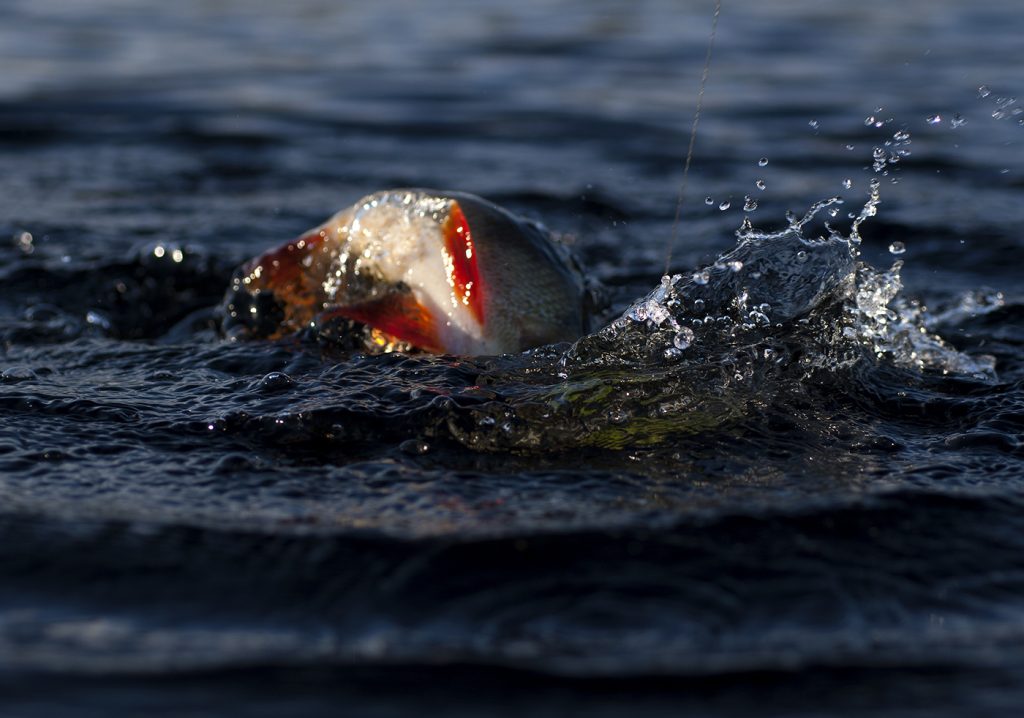
The summer’s high water temperatures are receding and as the water cools down, it’s time to get ready for the fall predator season. Maybe the lines, the wire leaders and the reels need a quick check up and maybe, just maybe, the boxes need a replenish with your favourite flies? Mine did – and still do. I’ve been enjoying tying flies with home made dubbing brushes recently.
Dubbing brushes have a lot of advantages and making them yourself even more. You can customise the brushes to the size of flies you want to tie and fill them with the colours, flash and materials that suits you best.
One of my favourite fly tying materials is Craft Fur and that happens to be just perfect for making dubbing dubbing brushes. I might go over how to make them some other day – for now I’ll stick to describing how I use them for my predator flies.
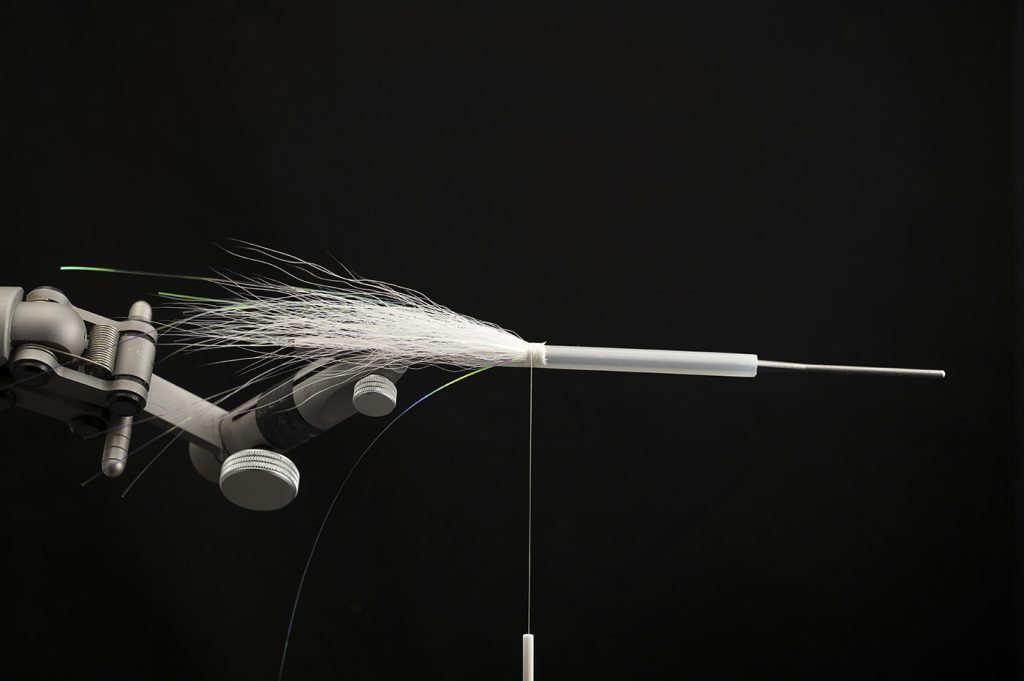
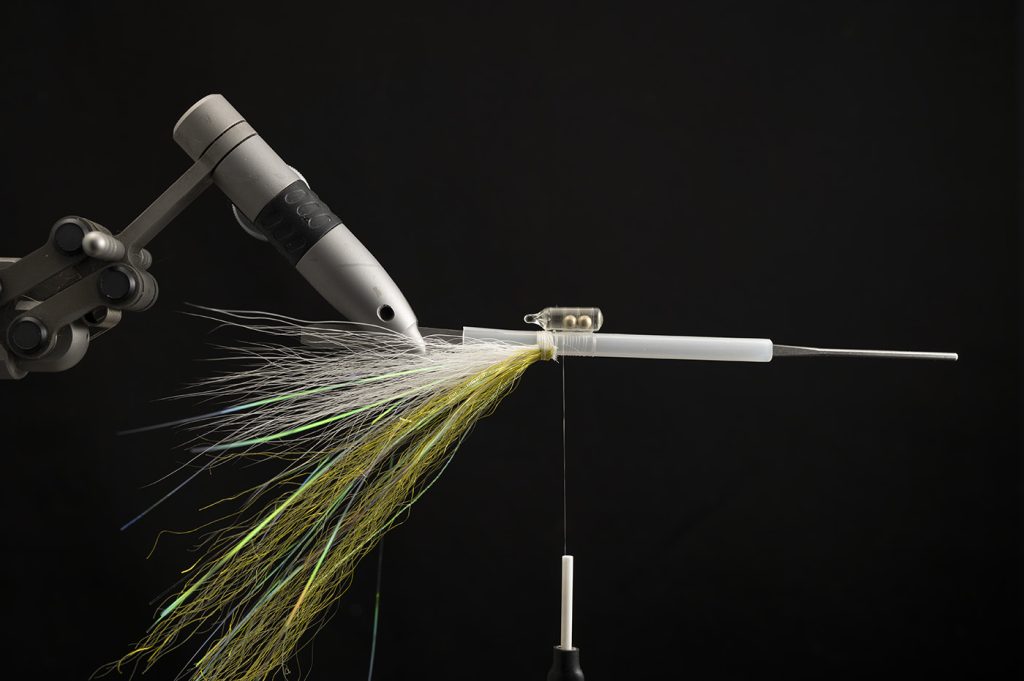
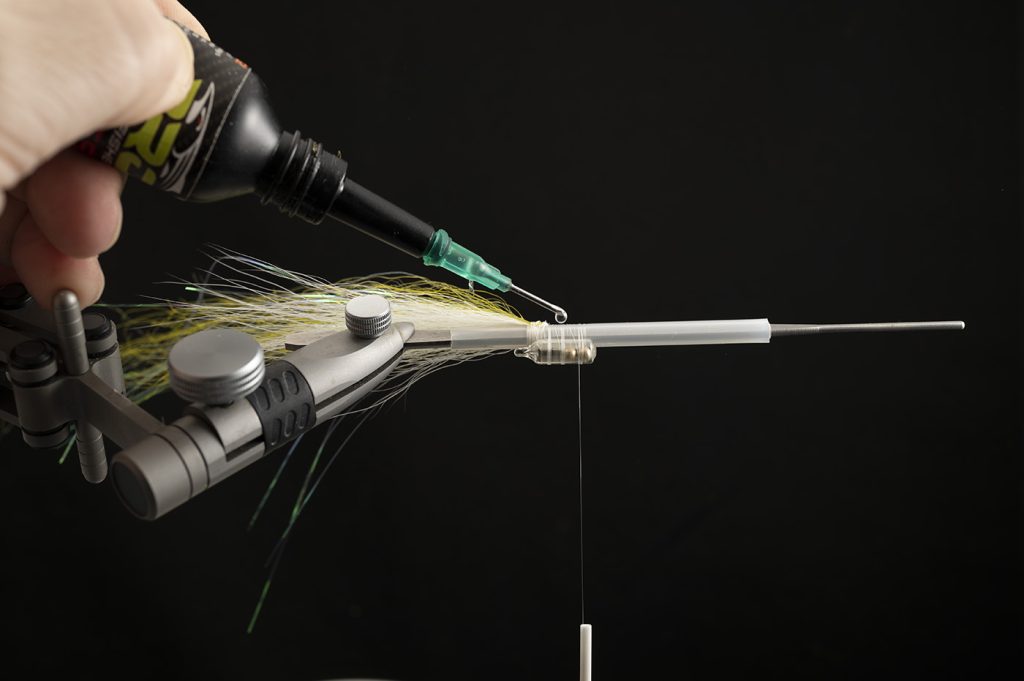
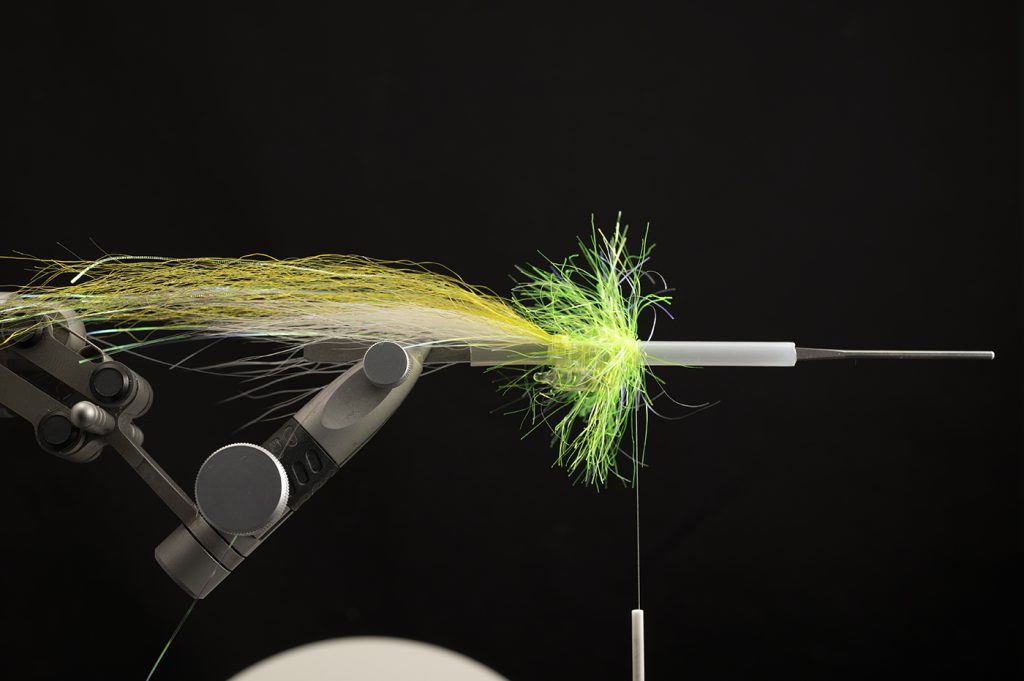
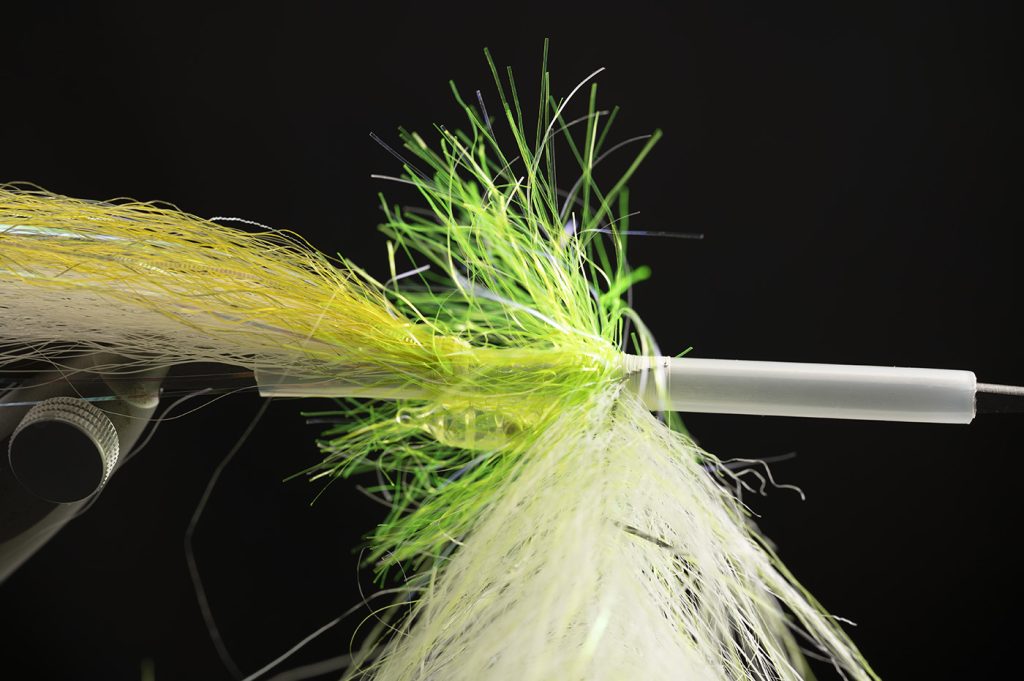
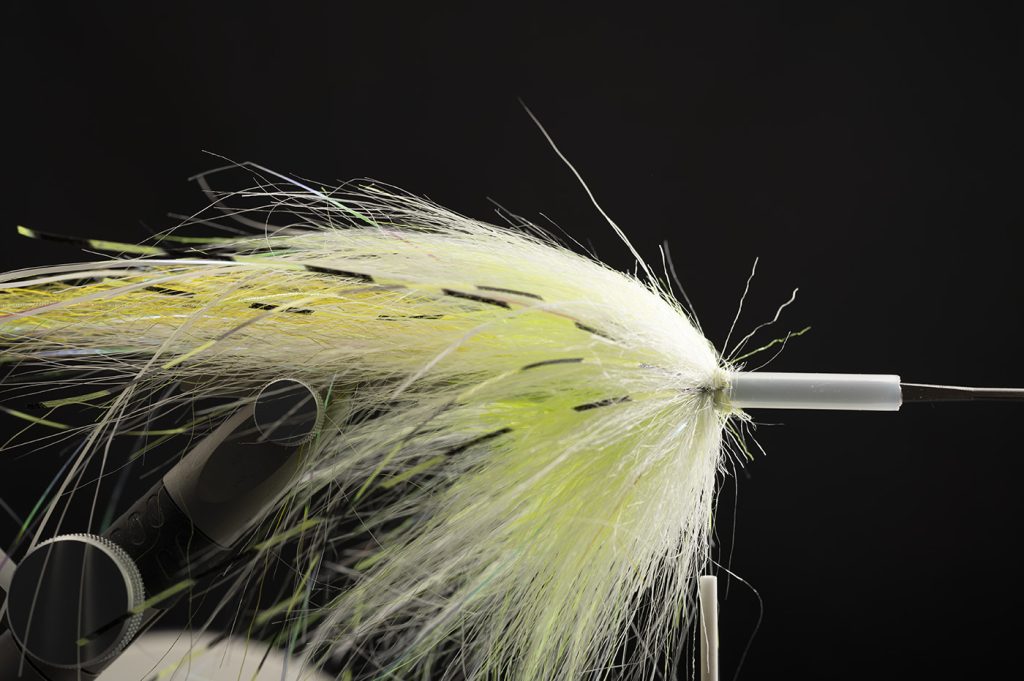
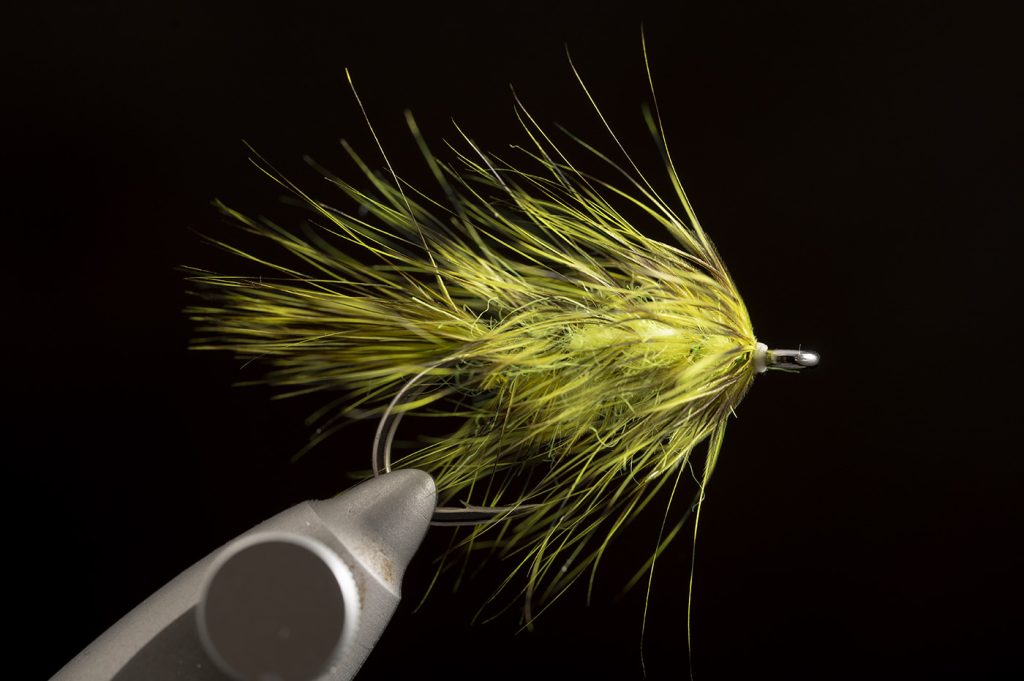
Fix a Pro Predator needle in the vice and tie on a bunch of white buck tail. The fly will end up sticking out quite a way further than the buck tail, so adjust the length of both that and the tube to accommodate the size of fly you want. Garnish with flash of your choice.Cut a small bunch of synthetic fibre, here olive and tie it in with approximately 70% of the length pointing towards the head of the fly. Tie in flash.Fold the synthetic and flash back and tie down. Now turn the tube upside-down and tie on a rattle. I’m using mono thread for this. Lash it down in two or three places.Secure the rattle with UV resin, making the sure the resin covers the void between the tube and rattle as well as secures the thread wraps.In front of the rattle, tie in chartreuse polar chenille and turn a significant collar.Tie in the dubbing brush with several wraps – this needs to be well tied in.Depending on how heavy you want the dressing, turn the dubbing 3-5 times, stroking the fibres back before every turn.
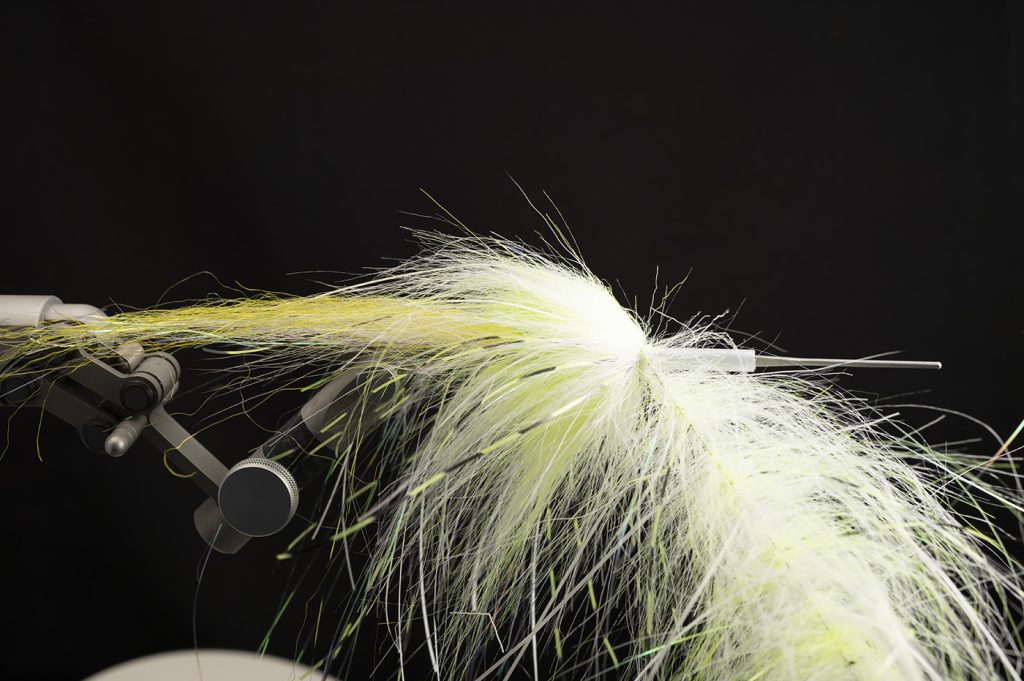
Wiggle the thread through the brush to tie it off securely. The less fibres you catch in this process, the better the brush is tied in. After the brush is cut off, cover the end with a few loose turns of thread and then a few tight turns to cover the sharp end of the wire. Stroke back any unruly fibres pointing forwards and tidy up.
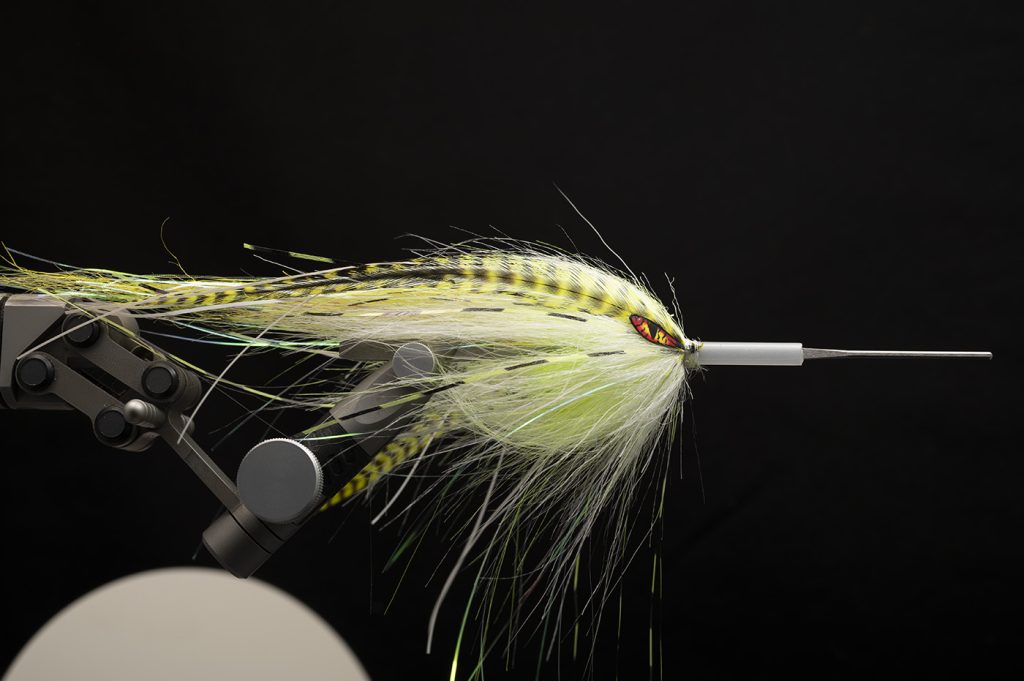
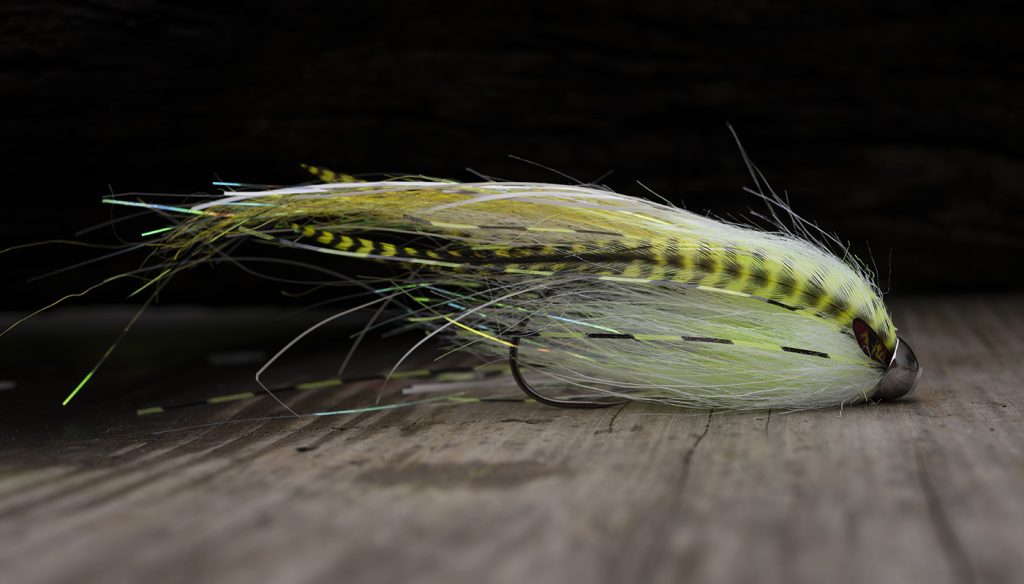
Tie in the Pro Predator Eyes and optional grizzle saddle feathers.Cut everything clean, tie off, slide on a Pro Predator cone head in silver and burn a collar to secure the cone head. Fly done.
The fly is not particularly time consuming, but of course the dubbing brush also takes a little while to make. Make it long enough and you can easily tie 3 or 4 flies from one brush. This style of fly is very, very mobile in the water and by adjusting how close you place the turns of the dubbing brush, you can adjust the bulk and volume of the fly as well.
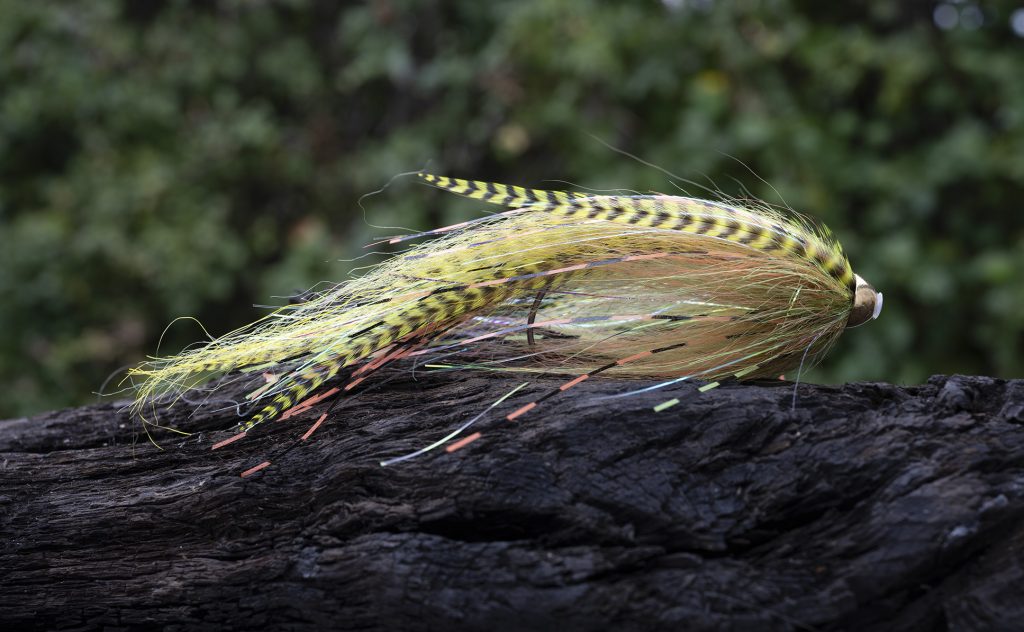
Fly pattern: Tube: Pro Sportfisher Predator tube. Tail: White buck tail w/ flash. Wing: Wild Olive Slinky Fiber w/ flash. Belly: Rattle and chartreuse Polar Chenille. Front: White/chartreuse dubbing brush with flash. Over wing: Chartreuse, grizzle saddle feathers. Eyes: Pro Predator Eyes. Head: Pro Sportfisher Predator cone head.
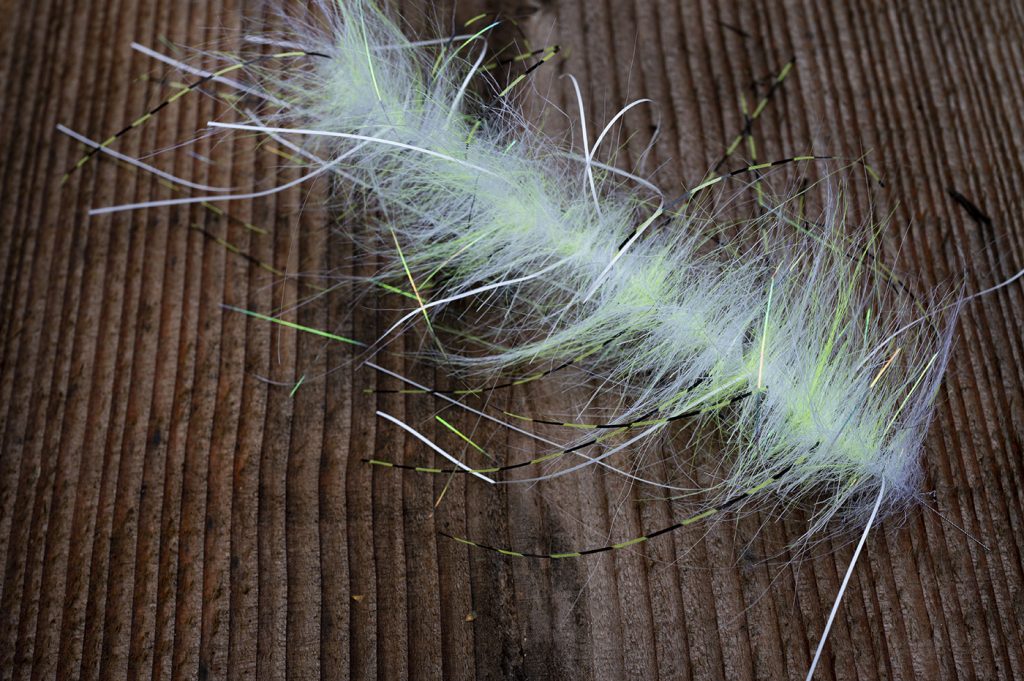
Dubbing brush
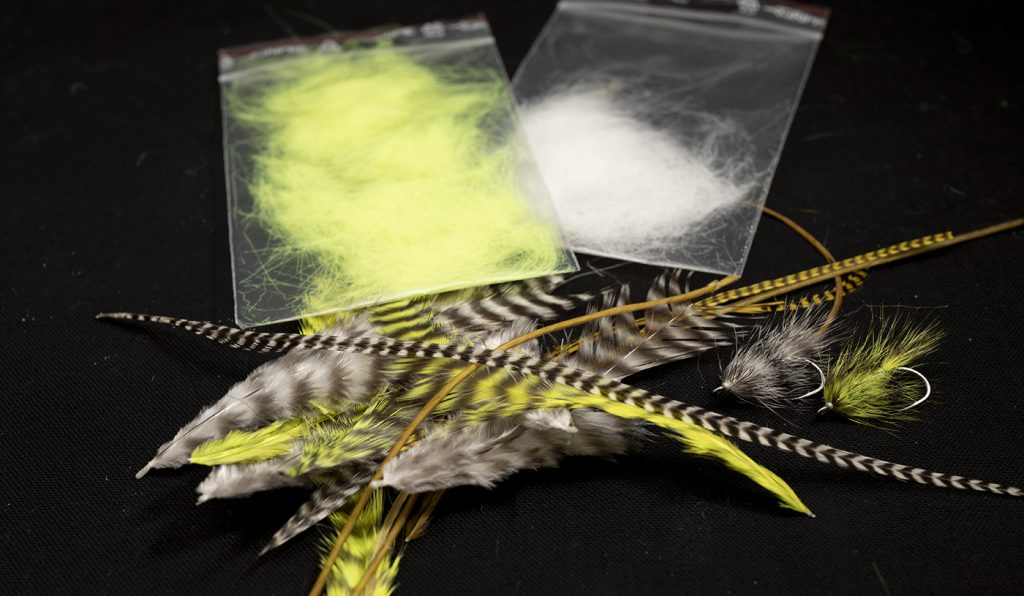
Making dubbing brushes and tying big predator flies in general produces a significant amount of surplus materials. I use the term, “surplus”, carefully, because it doesn’t have to be waste. From the Craft Fur you need to remove the very shortest parts and this makes a very fine (and highly fluorescent) dubbing. There’s usually also a longer piece of the saddle feathers left.A highly visible, highly useful palmer wet fly tied entirely fly with surplus materials from the above fly.The colour scheme can easily be adjusted to fit more imitative flies. Here’s my perch imitation.Several of the hooks in our Predator-series can be used for the fly. Here is my favourite, an XO774 in a size that fits the size of the fly. If you want the hook a little further back, a PR350 Light Predator is a fine choice.